Staff
Handbook: Tools :
Fetch
Staff
Handbook: Tools :
Fetch
Fetch
Transferring any type of file to and from server
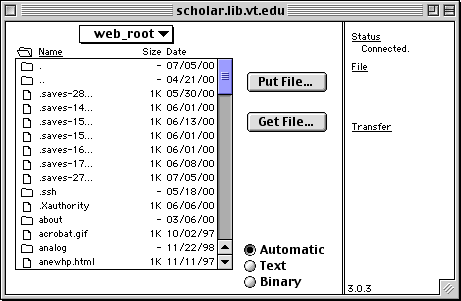
When Fetch is opened you will be presented with a window like the one below.

After you enter your user ID and password a directory window like the one below will come up. The three radio buttons at the bottom are for telling fetch what kind of file you are transferring. If the Text button is clicked then the file will be treated as a text file and you will have the option of converting any BinHex files embedded in the text file. The Binary button tells fetch to check and see if the file is in MacBinary II, AppleSingle, MacBinary I or MacHost format, and otherwise save it without any formatting or conversion. The Automatic button will try and determine the type of file you are trying to submit based on its name.
To transfer a file to the server first select which folder you want to put it in. There are two different ways to transfer files. One way to do it is by clicking on the Put File... button. Below is an example of the window that will come up after you click the button. This allows you to search the folders on the computer. After you find the file press open.
Fetch will then prompt you for the name that you want to give to the file and the type of format you would like the file to have. You should choose MacBinary II format if you plan to simply store the file on the other machine, BinHex if you plan to mail it to someone, and either Text, Wrapped Text, or Raw Data if you plan to manipulate the file on the host computer. Text will simply create a text file using the rules of the other system, Wrapped Text will limit lines to a certain length, and Raw Data will not perform any conversions at all.

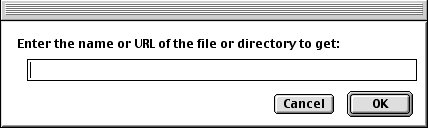
The other option is to click on the Get File... button. Below is the window that you will be presented with. This comes in handy when you need to get a file from a URL or when you know exactly where the file is located on the computer. After you type in the address or directory of the file press OK.
Fetch will then prompt you for the name that you want to give to the file and the type of format you would like the file to have. (see above for information on the different types of formats)
Creating and managing directories
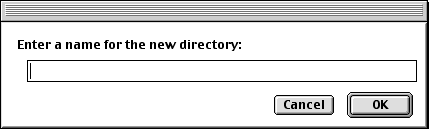
To create a new directory go to:
Directories >
Create New Directory...This menu command creates a new directory on the remote computer. You will be prompted for a name to give the directory; unless you specify otherwise the directory will be a sub-directory of the current one.
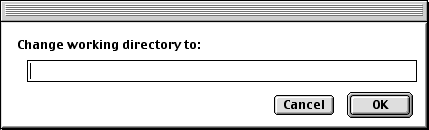
To change a directory go to:
Directories >
Change Directory...This menu allows you to specify the current directory by typing its name rather than by moving to it one step at a time. This is useful if you know the full name of the directory you wish to see and it is several steps away from the current one. You can also type or paste a URL into the Change Directory dialog. This lets you move to a directory on any server, regardless of whether you are currently signed on.
Deleting files and directories (be careful!)
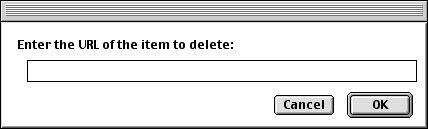
To delete a file or directory go to:
Remote >
Delete File or Directory...The window below is what will come up. This menu command allows you to delete files and directories on the host computer. If you select a name from the file list and choose this command you will be asked for confirmation before the file is deleted. If you have selected more than one file and give confirmation, all the files will be deleted. If you have not selected a file you will be asked for the name of the file to delete and then it will be deleted.
If you select a directory and choose this command Fetch will delete the directory's contents before deleting the directory itself.
If you are running System 7.5 or newer, you can also delete remote items by dragging them to the Finder Trash icon.