Snap Your Rhododendron Close-Up
Dr. Jay Slavitz, Nantucket, Mass
Reprinted from "The Rosebay" of the Massachusetts Chapter
|
|
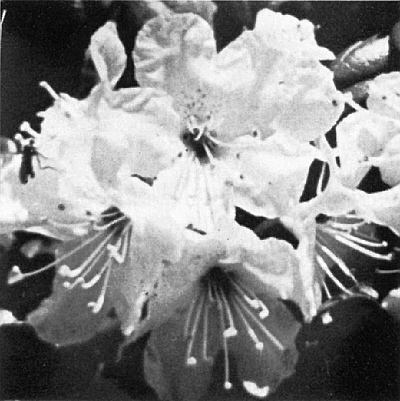
R. chrysanthum
, a yellow-flowered,
prostrate member of the Ponticum Series |
Photography can be an invaluable tool for the rhododendron grower as well as a means of expanding the pleasure which these beautiful subjects can provide. It is quite simple to obtain good photographs of an entire plant or group of plants in a garden setting, but initial attempts to get good close-up photos of a single truss are often disappointing. The techniques involved in close-up or "macro-photography" however are quite simple to master and it is this type of photography that this article is about. We will attempt to assemble an ideal camera set-up which will handle this type of photography easily. If the camera which you already have is different from what we describe don't despair. Most cameras can be adapted to this type of work easily and give very satisfactory results.
First, the camera: The prime consideration in choice of camera is the least technical. It must be one that is easy and comfortable for you to use. If the camera is cumbersome or difficult for you to use, you won't use it. The next factor would be how close can the camera focus or be made to focus. It should handle the range between 12 and 18 inches for our purposes. Few cameras "off the shelf" will focus in this range. Most of the simpler cameras on the market focus only to 3 feet. Better cameras focus as close as 18 inches. We focus closer by moving the lens outward or away from the film plane. Therefore our closest focusing distance is mechanically limited by how far we can extend the lens. If we could remove the lens and extend it further out we could focus much closer. We will discuss how this is done later on, but for now the ability to remove the lens or "lens interchangeability" is a factor we should consider when selecting our "ideal" camera.
The next factor in camera selection is the viewing system; what you see when you look through the viewfinder as compared to what the film "sees". Many cameras have separate viewing and taking lens systems so what you see and what the camera sees are slightly different. At the distances which most pictures are taken, five feet and beyond, this difference, or "parallax error", doesn't matter, but the distances at which we will be working, the error becomes considerable, to the extent that the subject we neatly frame in our viewfinder may not show up on the film at all. What we would like, then, is a viewing system which lets us see exactly what the film sees. This we find in the type of camera called a single-lens reflex or SLR, for short. By lucky coincidence most SLRs also feature full lens interchangeability, which we had stated as requirement number one.
The only other major consideration, then, is film size or format. Although single lens reflex cameras are available in a wide variety of film sizes, the vast majority are built to take 35 millimeter film. Any specialized requirements not withstanding, 35 mm would be the format of choice, considering the tremendous amount of equipment available in this size as well as the ready availability of numerous film types or emulsions.
The camera type described with its normal lens in place will probably focus to about eighteen inches. To get closer we will have to extend the lens further forward than its mounting would allow. To do this then we will remove the lens from the camera and place spacers or extensions between them. These extensions can be either rigid tubes of varying lengths or a continuously varying bellows, much like that seen on folding cameras of long ago. Both work equally well but my choice would be the bellows because it allows greater variability in its extension.
The choice of film type is next and with 35 mm, the choice is endless. Because so much of the beauty of our subjects is dependent upon color, rhododendrons and color photography are almost inseparable. The only exception as I see it would be the special requirements of publication. By far, the majority of 33 mm color is in the form of transparencies or slides. They are inexpensive, easy to store and transport, and ideal for display to large groups. It is also possible to have good prints made from slides if you have the need. The color in all films represents a compromise, none are absolutely accurate. One type may emphasize reds, another, greens etc. A suggestion would be to try different types and then settle on one or two which render colors most pleasing to you.
Although color perception is mostly subjective, it is possible to obtain objective near-accuracy by using print film. The techniques involved are not difficult but do go beyond the scope of this article.
Having then settled on the hardware, the major consideration must be the light. It is my feeling that the most dependable, consistent, and beautiful light source is natural sunlight. Most of our photography will be outdoors, so the use of sunlight is our obvious choice. The color of the sunlight varies according to time of day. Most outdoor color film is balanced to reproduce colors most accurately from two hours before until two hours after midday. Earlier or later times may cause the finished picture to be too red. Overcast or cloudy days will give a softer, more pastel rendition, but the slides may take on a bluish cast. These color shifts can be corrected by the use of filters. A good book on basic color photography can be a big help here. Backlight, with the sun shining through the petals is particularly effective. The trusses seem to glow with an incandescence of their own. If it is necessary to lighten a particularly dark shadow area, a reflector made of crumpled tinfoil, a piece of newspaper, or even a white shirt-front can be used to bounce a little sunlight into that dark corner. Really what I'm saying is, try to explore the full potential of natural sunlight before complicating your life with flash, strobe lights or whatever.
O.K., we now have our camera, lens extended with a bellows, loaded with fresh color film, bright sun and a rhody waiting to have its picture snapped, what now? Of course you've read the instructions that came with your camera and bellows unit but how about that little piece of paper that came with the film. The people who made that film have a large stake in your ability to take satisfactory pictures so they have provided you with some very important information. If you follow their recommendations as to shutter speed, etc. you should be close to right on. To be sure, try bracketing your exposures; that is, in addition to one shot at the recommended setting, take a shot ½ f stop above and one f stop below the recommended one. That way one is bound to be perfect. By keeping notes of your exposure times you will soon establish your own standard exposures for the majority of your work in the future.
One thing that must be remembered is that you must increase your exposure as you increase your lens extension to get closer to your subject. The exact amount of exposure increase will usually be found on a series of scales engraved directly upon the extension device. By the way, most filters will also require an adjustment of exposure as well. If, however, you are fortunate enough to have a camera which automatically adjusts exposure by reading the light coming directly through the taking lens, these problems are solved for you by the virtue of the camera's electronics.
A word about automatic cameras is perhaps in order here. There are cameras available today which literally think for themselves. This is fine for most picture-taking situations but for those special instances which occasionally creep up, you want the option of overriding the electronics. A couple of years ago a new camera came on the market which offered, I thought, great possibilities. The camera was the Polaroid SX-70. It had reflex viewing, automatic exposure, could focus to 10½ inches without attachments, to 5 inches with a simple converter. True, it did not produce slides which could be shown to large groups simultaneously but if your needs were to provide records for yourself or pictures to show to only a few people at a time this didn't seem to be a serious drawback. I bought one and immediately hauled it off to Philadelphia for the 1976 A.R.S. Convention. The results were a disappointment. Although the camera performed flawlessly, the colors produced on film bore only distant resemblance to the flowers portrayed. The film does a great job on people, dogs and the like, but rhododendrons are not its strong suit. The moral of this story is, before going out to photograph a once-in-a lifetime event, know your equipment thoroughly.
In conclusion, I hope that I have provided you with a little knowledge and a little nudge to capture your rhodies on film. Good Luck!