The Raising of Rhododendrons From Seeds and Cuttings
Anyone with average diligence, observing capacity and perseverance can propagate rhododendrons. There are no tricks involved,. whether the method be by seed, grafting, layering or cuttings. But there are no short cuts, either; the principles of nature must be followed throughout.
I do not propose to write a treatise on general propagation, which would readily fill a volume by itself; but I wish to explain nature's own method, the raising of shrubs from seed. Through the seed, the human mind can select and control improvements in the nature of the shrub itself.
In the past we have relied chiefly on the ingenuity of English gardeners, who have cultivated rhododendrons for more than a hundred years. Expert English growers have become famous by their introduction of today's standard varieties as well as their new hybrids. But now American gardeners are beginning to try their hand at propagating this glorious shrub, and are eager to learn the best methods of doing it. A general understanding of plant nature will be useful, for rhododendrons have peculiarities of their own. For example, in comparison with many other plant forms, they are very slow in getting started. This slowness in reaching maturity points to a life span far beyond the normal term of years for human beings. Our hurried ways of living are not in keeping with rhododendron production, for time is leisurely even in infancy.
Under proper conditions, rhododendron seed keeps its viability for several years. The first two years of its life, the germinative faculty remains 100 per cent, unless the seed is poorly stored or sown under unsuitable conditions. The seed is usually very small and variable in shape, depending on the nature of the parents. Some species have seed comparable to that of tuberous begonias while others are nearly the size of flax and similar in form, perhaps more elongated and furnished with bract-like wings for wind distribution.
The basic sowing medium for raising rhododendrons from seed is a very sandy, porous soil, preferably half or more being fine peat moss. A mixture of half sand and half peat alone will be found very satisfactory to obtain germination, but as the plants begin to grow they need food. If the mixture contains soil suited for the purpose, extra feeding may not be essential, and the growth will be normal.
Taking a seed pan not more than 2½ inches deep, fill it to a depth of 1½ inches with the soil mixture. Top this with a half inch of sand and peat mixed, leaving a half inch of air space at the top of the pan. Gently tamp this mixture smooth, then scatter the seed very thinly by means of a sheet of cardboard of postcard size. Hold the seed on the slightly funneled card and tap with a finger of the other hand, gradually encouraging the seed to fall onto the pan evenly distributed but not crowded. If you have more seed than you can space thinly, it is wisdom not to sow it all but keep some for another time. Crowded seeding seldom turns out to any advantage; as the seeds germinate too thickly, the first time they get too much or too little water, rot sets in and the whole is lost.
After the seed is sown, put a pane of glass over the seed pan and place it in a very shallow bath of water so that the moisture penetrates the seeding mixture very gradually. Be careful not to flood the top or your seed may float in drifts. I myself usually leave my seed pans in water for four or five days, then remove them to a bench. Place them where a bottom heat of 65 or 68 degrees can be maintained constantly for a period of at least two months. A temperature even a bit higher may be used if one is very careful; this heat brings on a stimulated growth but with the danger of softness, inviting decay with the least abuse of water.
For the first 10 days, covering the glass with newspaper is desirable to reduce evaporation. It has been my practice not to water the seed pans until germination has been completed. After germination, air and light are essential but must be given with extreme watchfulness. Admit air very gradually, for too much of it may dry the little rootlets or stunt them before they' have sunk into the compost. Light must be constant, yet sun striking the seedlings would quickly stunt them. Great care is needed at this stage, and carelessness will upset all.
My own experience has shown that most of my seed sowings have germinated after 15 to 25 days. However, germination may be retarded by vacillating temperatures. Low temperatures such as 50 to 55 degrees would prolong the germination period perhaps to over a month. Meantime moisture must never fail, for if germination has started, a drying out for just few hours may shrivel the little germs. Too much water during the same period will drown them.
During the first three to four months, the seedlings should be exposed to air more and more but never allowed to become dry. In the first stage, when watering is needed it is best to dip the seed pans into trays of water for a couple of hours so that they are fully penetrated. However, once the seedlings are well rooted, one may use a fine mist-like nozzle to water them from above. Rhododendrons need much atmospheric moisture in their early stages. If your greenhouse is well ventilated, it is well to enclose your seed pans in a closed frame to reduce the need of constant spraying during sunny days.
You do not need to have a greenhouse to start rhododendrons from seed. It can be done almost as readily in a frame outdoors in early spring if electric cable heat is available so that the soil temperature remains constant at 65 or 70 degrees For persons not provided with electric cable heat, there is still a way of doing it successfully. Simply delay the sowing of the seed until towards the end of May and let the sun provide the needed temperature. If a frame is well shaded with whitewash over the glass, the sunshine will produce enough heat for germination to take place during June; even if it takes a little longer for seed to germinate, results still are most encouraging. Of course, this method requires close watching so that the needed moisture never fails, and during windy days one has to be doubly alert to prevent drying out even in a tightly closed frame.
When should rhododendron seeds be sown? The answer depends largely on the equipment to be used. For instance, in my own case where greenhouse heat is on tap at all times, I prefer to make my sowings shortly after Christmas or in the first days of January, for the winter months of January and February usually allow me more leisure to watch out for the welfare of the seed germination. However, those not equipped for maintaining heat evenly may have reason to make their sowings in early spring, for then the heating problem is much smaller. Those who must dispense with artificial heat should do their sowing in late May or early June. The seedlings sown late will be rather small to go into their first winter, and must be watched very carefully in a frame against serious cold or drying out. On the other hand, early sown seedlings transplanted as soon as large enough, usually after three or four months from time of germination, will frequently be three inches tall and able to survive normal winter weather with a covering against excessive rains.
As rhododendron seed is very fine, beginners will sow it too densely, which will not hinder germination but will crowd the young plants. This crowding makes the plants spindly and delicate so that the least mishandling of water, giving either too much or too little, subjects them to the rotting commonly called "damping off." To prevent that, it is advisable to cover the young seedlings, soon after germination, with a trace of fine, clean sand applied through a fine kitchen sieve. Use just enough to cover the soil without covering the plants. The sand provides a surface that will dry quickly under the influence of air, handicapping the formation of the damping-off fungus, which only thrives where moisture is constant.
Some growers rely on damping-off remedies, which are being sold under various names, but my policy is to work with nature by preventing the start of the destructive enemy. If once the damping off begins, take the seed pans immediately into a better ventilated spot and sprinkle them lightly with dry wood ashes, using the kitchen sieve to make the distribution even. Let the seed pan then remain dry for one day and water only as needed afterward. Mercurial compounds such as Semesan are frequently recommended, but I prefer to remain closer to nature, and have yet to lose an entire batch of seedlings from damping off. It must be mentioned, however, that high temperatures and high humidity, as well as lack of ventilation, are chief causes of losses.
The seedling rhododendrons will carry their parental peculiarities such as growth habits, dimensions and types. Nevertheless, they should be transplanted as soon as possible. Space them an inch or two apart in a soil a bit richer than that in the seed pan. This transplanting offers the same problems as transplanting tuberous begonia seedlings, for the young plants are very small. A small stick about the size of a fountain pen may be used. The point may even be forked slightly to lift the plants out of the seed compost. The roots are frequently an inch long, intertwined into the peat compost. If the compost is the least bit tight, I like to use a 12-penny nail to loose the roots. A planting dibble about the size of your finger serves best for the planting. In the new compost of a flat or shallow box filled about 2½ inches deep, insert this dibble to the depth required to hold the roots, then press the soil sideways so that the first two leaves are a quarter to a half inch above the compost. The spacing of the plants depends on their size and your facilities. My system is to put them into flats 15 x 18 inches, setting 7 rows the short way and 9 rows the long way, making 63 to 48 per flat, depending on the number to be transplanted.
In using sandy soils, it is to be borne in mind that soil fertility soon leaches out, and artificial feeding will be needed to keep the plants in good color. This artificial feeding can be accomplished in many ways and with different combinations, provided that lime elements are never part of the mixture, for rhododendrons as a whole prefer acid fertilizers. Organic fertilizers such as old manure, hops and cotton-seed meals will work wonders if applied as thin mulches over the seedling flats after the plants are beginning to grow and have recovered from the shock of transplanting. Liquid fertilizers are also very effective if applied with a great deal of caution. Taken as a whole, rhododendrons in nature are usually not heavy feeders and will thrive in soils that would bring on starvation in other plant species. This factor must be considered as a guide when applying fertilizers, for the least overdose can bring on stunting of growth. Mulching with dry manures is preferable to quick-acting chemical solutions that are too frequently applied in overdoses. What is all-important to rhododendrons, young or old, is that soil be open and porous so that air as well as water can circulate freely as the root system is truly hair-like in its fineness and seems to enjoy growing in old decaying wood.
|
|
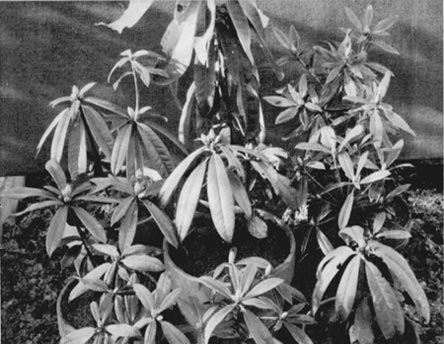
Fig. 11 Four year old rhododendron seedlings with flower buds.
Raised by John Bacher. Bacher photo |
As the plants grow under the stimulus of constant moisture, partial shade and atmospheric humidity, their need for sunlight increases and shade may be desirable for only a few hours daily during the warmest part of the summer. Two-year seedlings may be transplanted into the open ground. With essential moisture and congenial soil conditions, the third year will make them sturdy enough to prosper in full sun. It is possible that the fourth year will produce a good share of flowering plants; that is, the buds for blooms will form in late summer. The illustrations show two-year-old seedlings that have been two seasons in the open without any shelter except from a couple of fir trees providing a trace of shade. See Fig 11.
I believe that a congenial soil, not too dry nor too wet, will enable one to grow rhododendron seedlings. to flowering size in from four to six years. Much depends on the ancestry, for some species are very early flowering while others need 15 to 20 years, the Taliense group, for instance.
Fortunei
and
decorum
types will bloom readily in four to five years, while
lapponicums
can be had in flower the second and third year from seed, I have found.
Griersonianum
as a parent seems to assure flowering from the fourth year on.
The science of hybridization will certainly bring much new information about rhododendrons, but raising the plants from seed is the first step that has to be mastered for ultimate success and satisfaction. The collection of new species from China will henceforth be greatly handicapped, and there is much wisdom in using the available seeds from the latest Rock expedition in Yunnan and Southwest China. The trip was planned so suddenly that no flowers could be collected; therefore the determination of names is uncertain. When the new seedlings come into flower, there may be many unsuspected plant jewels among them. Any new material for future breeding successes will surely play an important role in the world of rhododendrons.
A method of propagation for existing varieties is available to those who are endowed with the proverbial green fingers. This is the raising of plants from cuttings. This method is quite simple to use but calls for dependable bottom heat such as obtained from plants to the flat. My faster growing species usually are spaced to take 36 electric heating cables. In late summer or early winter, depending on locality, soils and season, take the cuttings from the tips of branches after they reach the stage of three-fourths maturity. These cuttings may be of various dimensions, anywhere from seven inches to two and a half inches long, and of variable diameter according to kind. Make a cut close to a leaf. You may remove the bottom leaves for a distance of one and a half to three inches. The cut surface may be dipped into Rootone powder for stimulating the formation of callus at the cut on the base of the cutting. For rooting mixture, fill a flat with one-third sand and two-thirds finely pulverized fresh peat moss, slightly damp and mixed together. In this, space the cuttings fairly close together until the flat is full. Then water the flat freely and provide it with a label giving the name of the variety as well as the time when the planting is made. Place the flat of cuttings in a propagating frame that is more or less airtight, with bottom heat of 70 degrees. Then shade the whole with paper, and watch daily to see that moisture never fails either in the atmosphere or in the growing compound. The 70-degree temperature and 85 percent saturation of the atmosphere should be maintained at all times. Light is essential for success, but not in the form of sunshine.
The process of rooting cuttings is quite slow. Frequently cuttings may require four to six months to get under way, but once roots begin to form it is well to lift the plants and pot them unless one has free bench space to grow them on. Growing the young plants in a bench for the first season has advantages over potting, for the roots do not suffer from transplanting into a bench of peaty soil, while in the pots there is frequent moisture fluctuation detrimental to their well being. Again, the important thing to watch is that the plants do not become dry or are exposed to full sunlight or bright light. Care in these matters makes for sturdy growth and early blooming.
Cuttings of fully matured branches usually need double time for rooting and may take more than a year to root. Some sorts are very reluctant to root at all. It is highly specialized work, but an amateur who has the facilities and the time and patience can master this method of rooting choice shrubs. However, anyone will have much to gain by patronizing the specialist grower, who usually is able to supply today's wants at prices quite in proportion to production costs.