JARS v40n2 - Rhododendron Pediatrics
Rhododendron Pediatrics
Mark Konrad, M.D.
Sewickley, Pennsylvania
Raising anything well requires instinct, knowledge, experience, love, understanding and many other things too numerous to mention including patience. The dawning hours of life, when the young are the most defenseless and undeveloped and therefore the most vulnerable to the demands of the environment are the most critical time for nurture. In the natural world, rhododendrons compensate well with the enormous production of seed thereby securing survival.
|
|
Figure 1
Photo by Mark Konrad |
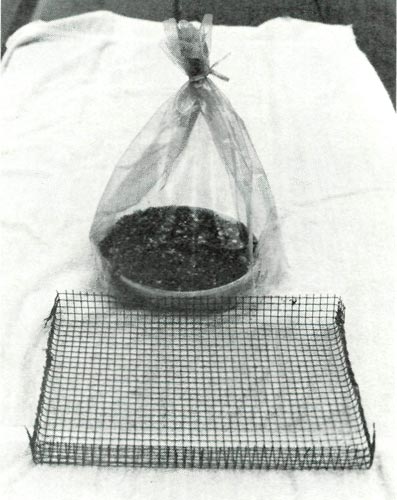
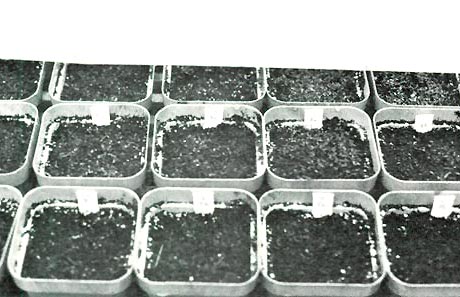
To develop expertise in the nurture of rhododendrons, I believe one must master the principles which are appropriate and attune to the natural and juvenile state. The ideal conditions for the first two or three months of a rhododendron's life have been well established; i.e. a highly humid atmosphere under closed conditions, usually under plastic with a sterile media, an incubator, if you will, with the proper light and temperature. (Figure 1) When many crosses are planted, a flat with pots can be used as an alternative method to save time. (Figure 2)
|
|
Figure 2
Photo by Mark Konrad |
|
|
Figure 3
Photo by Mark Konrad |
The next stage of nurture becomes more difficult because of the many variables to be added. With this in mind, I will concentrate in this article on the last nine months or so of the first year.
This stage has become easier with the development of ideal formulas for young seedlings. Generally these revolve around the following: perlite for porosity, Canadian peat for acidity and sandy loam for nutrients and mycorrhizae inoculation. The addition of shredded oak leaves or shredded pine bark can also be beneficial for further conditioning or amending of the media. The latter could help supply the nutrients in a more natural way.
So with everything right with Dr. Spock, how long will it take to raise the perfect baby? As we learn in human life, both heredity and environment are involved. It is important to know what evolutionary complexities are to be dealt with so that the best possible plants can be produced.
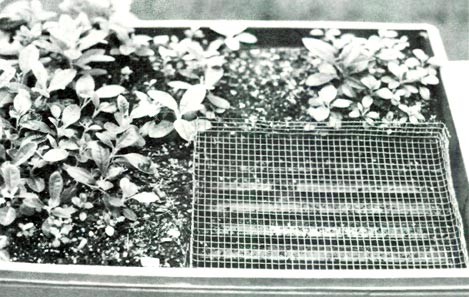
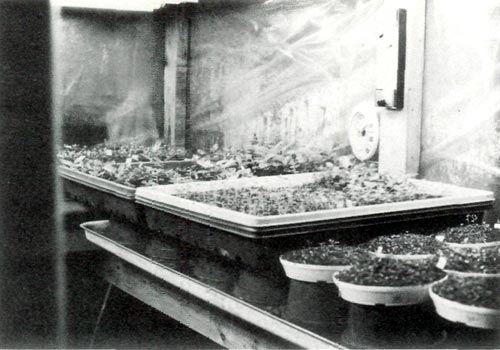
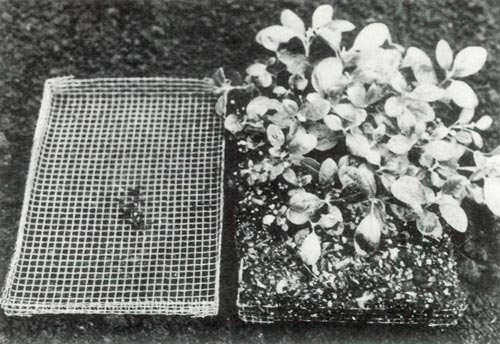
To stay within the natural cycle of development, my seedlings are transplanted into small flats measuring 7½" x 9½" x 1" which have been fashioned out of ¼" wire mesh with the use of tin snips. (Figure 3) Four of these fit into a larger plastic flat with a ribbed bottom. This allows for perfect drainage and makes overwatering almost impossible. The flats also allow for excellent portability. When the seedlings have two or three true leaves, they are transplanted and then placed in my outdoor growth chamber as described in the 1982 Summer issue of the ARS Journal . (Figure 4)
|
|
Figure 4
Photo by Mark Konrad |
The growth chamber is an excellent tool as it allows for a natural transition from the earlier incubator stage. The light, temperature and humidity are beautifully controlled but there is still enough air circulation to help avoid the risk of diseases. Under these conditions, only minimal watering is required.
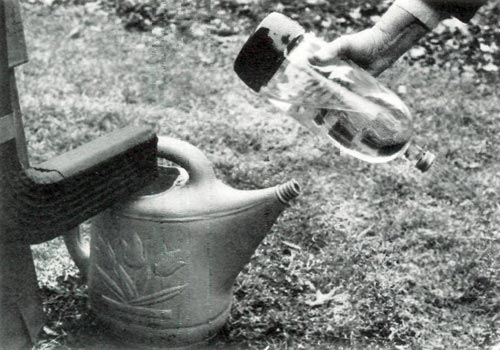
As yet I have not discussed the water for the baby's formula. I believe this has been the most neglected part of rhododendron culture. I have noted a dramatic improvement since converting to rain water which can be simply done. (Figure 5) Good or bad? Although the rain is acid in this region, many undesirable chemicals are avoided.
|
|
Figure 5
Photo by Mark Konrad |
Another thing not mentioned so far is the addition of supplemental nutrients (fertilizer) to the infant diet. Now everyone knows that you feed pabulum and not steak to an infant. The same should hold true with fertilizer since rhododendrons are low nutrient feeders anyway. Unfortunately, we all have a compulsion to make the slow growing seedlings move faster. I do too, but try and control the situation somewhat by using a surface application of "Scott's Azalea and Rhododendron Fertilizer" which is complete with trace elements. A small pinch of this is spread over the flat with the use of a piece of paper. But even before this is done, I try to once again simulate the natural state with the use of a shredded pine bark mulch when the seedlings are ½" to 1" tall. This can serve as a buffering layer for the media.
The seedlings are allowed to luxuriate in the growth chamber until May 1st. At that time, they are five to six months old, depending on the starting time, and 1" to 2" in size. In some cases the plants are much larger depending on their genetic makeup.
|
|
Figure 6
Photo by Mark Konrad |
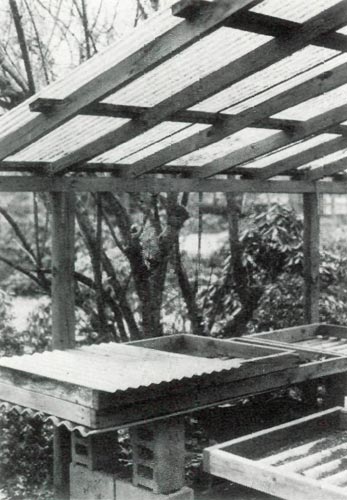
At this time they are moved to the outdoors, but kept again under very controlled conditions. They are placed on benches beneath a plastic shelter. (Figure 6) This is also a wonderful tool which helps moderate natural acclimatization. The young seedlings are protected from the rain by the plastic panels over the benches. The environment is controlled throughout the transition. After two or three weeks, the wire mesh flats, without further transplanting, are placed directly on the ground with soil placed slightly between and around the edges. (Figure 7) The seedlings are protected from excessive sun with a burlap or plastic mesh shade over a wire frame. This also prevents a pounding rain from doing any damage to the young plants or compacting the media mix.
|
|
Figure 7
Photo by Mark Konrad |
|
|
Figure 8
Photo by Mark Konrad |
Watering during the summer is done as necessary. The addition of a pinch of powdered sulfur by and large controls most of the chewing creatures. Should insect damage develop into a major problem, other insecticides may be considered. The wire flats also protect against mole upheaval.
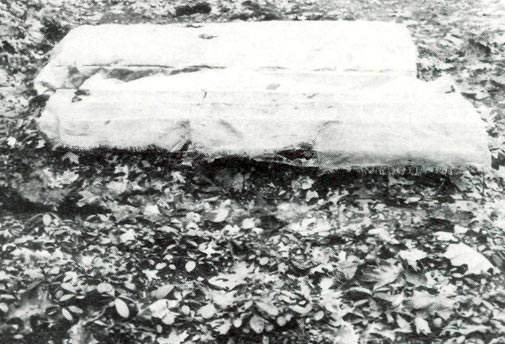
Winter care is rather simple with the addition of a covering of plastic film over the wire frame, leaving the burlap in place to prevent sun scald. Leave the ends open for air circulation and temperature control. A few leaves might also be scattered over the surface for frost protection. The seedlings over-winter well. It may be necessary to water occasionally depending on the climatic conditions. (Figure8)
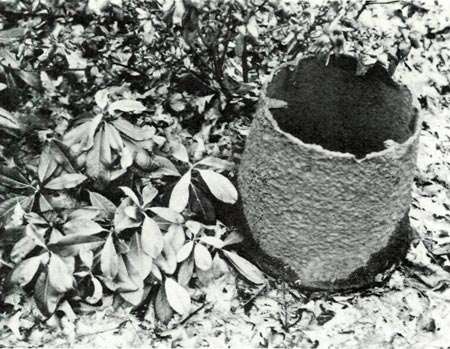
The spring of the following year, the seedlings are ready for transplanting. I prefer transplanting them into a circular space since the plants seem to thrive when growing together as they do in nature. Twenty or thirty plants are placed together. They seldom get lost to the weeds this way. In the case of a tender cross, it's convenient to cover them for winter protection with a paper pot with the bottom removed. (Figure 9)
|
|
Figure 9
Photo by Mark Konrad |
In summary, I would like to stress the importance of learning the natural cycle of rhododendron development and the indigenous needs that have evolved. It is important to rule out as many variables as possible so that failures from genetic incompatibility, weakness and other causes can be readily identified thus eliminating false assumptions and incorrect judgment when altering your technique.
It does not follow that good technique always gives the desired result. Timing is also very important so that the plants can get into a natural cycle as quickly as possible. By the age of six or seven months and before the end of May, the plants should hit the ground allowing for a full growing season outdoors under completely natural conditions. The statement that "you really don't have much until the plants are in the ground growing" might well be justified. We are again reminded of the adage "time is of the essence" since by July 15th, we are already on the back side of the outdoor growing phase. It is well to capture as much of the first season as possible to maximize the growth for the ensuing winter.
The method outlined is economical, methodical and allows for as little or as much time as one would like to devote to this fascinating hobby. It prevents discouragement by permitting an even distribution of work thus avoiding involvement at peak season.
Dr. Konrad has written several articles for past issues of the Journal describing his practical techniques for raising rhododendrons. This article summarizes twenty-five years of his accumulated experience.
